7.30.2010

Sometimes favorite photographs become that way over a long time. It's almost like they earn their place in your pantheon of pictures....


I was tooling around Rome after doing a side project for IBM.  What's a side project?  Well, I was originally booked in to do a project in Monte Carlo.  I did that job for the better part of a week and then, on the last day of the project one of the public relations people asked me if I could make room for Rome.  Of course I can make room for Rome.  I cancelled my train tix on the TGV to Paris and booked a quick, direct flight on Air Littoral.

When I work in Rome I head straight for the Hotel Victoria, just across the main road from the Borgeze Gardens at the top of the via Veneto.  It's an old hotel but it's very reliable.  Belinda found it first on a trip eight or nine years earlier.  Paul B. and I stayed there during a long project in 1995.  They put me in a room up on the fifth floor with a view of the park.

I spent three days tracking down and photographing IBM employees at their EMEA HQ just outside the eternal city and then tacked on a few personal days for walking around in the streets with my camera.  If memory serves correctly I was bouncing back and forth between a Nikon F5 with an 85mm 1.4 and a Mamiya 6 with a 75mm.  This image is definitely from the Mamiya stack.

The image above is a scan or copy shot from a print.  It's random and yet I've come to love it for the rich gestures and the wonderful juxtaposition of the train and the women.  I also love the liberal use of polka dots.

I got this photography because I didn't have an agenda.  I was walking around Termini station because that's where people come and go and the comings and goings are always rich ground for photographers.

7.29.2010

You have to get wet if you want to learn to swim.

If you want to swim competitively, at a very high level,  you'll need to spend time in the water.  A lot of time in the water.  When I swam in high school and college we hit the pool at 5:30 am every morning.  We swam for two hours and then went to class.  When classes ended we headed back to the pool for another hour and a half (if you were a sprinter) or two hours (if you were a distance swimmer).  During the middle of the December we averaged 10,000 to 12,000 yards a day.  Five days a week.

Today, swimmers focus on just as much training out of the pool.  They work on flexibility and strength training.  I'd venture to say that they think about swimming technique a number of times throughout the day.  Before the last Olympics Michael Phelps swam workouts 365 days a year.  That's what it took to be the best in the world.

But here's the interesting thing:  When college football is over the players who didn't make the pro cut stop playing. Same with baseball players and gymnasts.    Most swimmers never stop.  I swim six days a week with a masters swim team.  We have members who are in their sixties who are fast, highly competitive swimmers.  They never give up.  They rarely miss practice.  They know that if they miss a week or two or, horrors! a month!  Their conditioning and feel of the water start to decline.  Even a week out of the water means a rough re-entry.  Because physical technique requires constant practice.

So why is it that many photographers don't get that constant practice is really required to perform photography well?  Too many people put off taking photographs until it's "convenient and then wonder why they don't improve.  Why their craft seems to plateau.  Why they don't "feel" the flow of their creativity in the way they want to.  I think photography is every bit as demanding as competitive swimming but in a different way.  It's so much more multi-sensory.  You have to be able to look with rigor and, at the same time, block out the distracting thoughts of everyday life that dilute your intention and your conscious focus.

You need a clear head so your hands and eyes and feet all operate together as a unit.  So you can capture the image you want at the exact millisecond you want.  I'm not saying you need to do exercises or drills to become better but you have to spend time in the water.  You have to spend time with your camera.  You have to spend time practicing seeing.  And maybe most importantly, you have to spend quiet time with yourself, alone, thinking about why you photograph.

I conjecture that only by knowing what really motivates you to pursue photography will you be able to channel the energy and spirit to ignore the mental and physical roadblocks that every day life tosses in front of each of use like a never ending shower of kabers. Because only when you are clear about the real value you get from exploring photography do I think you will overcome the impediments to clearly seeing and capturing images that move you with passion.

Here are a few things I find helpful when I hit a creative block:

1.  Lie on the floor and clear your mind of everything.  Go blank.  When thoughts come into your head look at them in a dispassionate way and then let them go.  Pay attention to visual constructions.  And then let them go.  Get back off the floor when you feel the desire to create come back.

2.  When you are clear about why you photograph and what subjects give you pleasure (as opposed to subjects that serve to gratify your ego because you know that others will respond to them) visualize an end result for your work.  It could be the construction of a private book of images just for you or a show of your work in a public place.  You might even send prints out to people as anonymous gifts.

3.  Everyone has their own cliche images.  But if we try to avoid the sticky cliches we give them a certain perverse power and they become more dominant in our field of view.  Instead, shoot all of your cliches and then move on.

4.  Edit down your vision.  If you try to do every aspect of photography well you dilute the things you do extremely well.  Every swimmer has a favorite stroke.  That's the one they work on.  Boil it down to its essence.

5.  Find a kindred spirit who can be a mean son of a bitch and be politely but firmly critical with each other's work.  Having all nice critics around makes for a lazy artist.  Sometimes you need someone else to tell you what you don't want to hear about your work or your approach to work so you can get past it.

6.  Once you are clear on what you want and how you want it you have to make time to do it.  That means you have to make photography a priority in direct proportion to how much you want to get out of your photography.  

7.  Don't do it for love or money, do it because you feel compelled to do it.

8.  Like eating, breathing and swimming, do it everyday.  Doesn't have to be hours and hours.  Just enough to keep you fresh and loose.

9.  Don't compare yourself to  other artists.  You are on your own path.  Your life is different from mine.  I might hate your work and you might hate mine but it doesn't matter.  Neither of us is right and neither of us is wrong.  If we're being true to our real vision.

10.  You can't swim without a pool.  You can't shoot without a camera.  Don't leave it at home.  The camera is like your shirt or your shoes.  Take it everywhere you take your body.  Then you'll be ready when the image you love arrives in front of you like a gift.  Be gracious.  Be ready to accept the gift.

Penny's Pastries. Looking for connection.


I think we all love to photograph people on location but how do we decide where to pose them, how to pose them, what to say to get just the right expression and how to go about lighting it all?  When I photographed Penny she let me know right up front that she was pressed for time, didn't like to be photographed and expected to stand next to a wall and have a mug shot done in about five minutes.

My first mission was managing expectations.  I started with mine first.  I knew right away that I wasn't going to get an hour for pre-lighting and then a big chunk of Penny's time to play with while we performed some leisure dance of mutual exploration aimed at carefully extracting the "real" Penny for a portrait.  It was going to be a quick process.

But I needed to manage her expectations as well.  I quickly told her what the intentions of the magazine were.  How they were likely to use the image.  What the advertising rates in the magazine were like, and how great it was that she would get this editorial coverage for her business.  Then I told her how much time I'd need and what I was trying to get from the shot.  I have a good friend who also owns a bakery so I was able to ask her some questions without coming off like a complete idiot.  When she got that I really was interested in her and her business she settled into the shoot just fine.


My biggest challenge was finding the right spot to set up and shoot in.  We were in the middle of a working commercial bakery!  I wanted to show the ovens and some product so I started to narrow down the real estate.  I found the right spot but I needed to have Penny leaning on the table to make the whole frame work and to show the ovens in the background.


I lit her with a 4 foot by 6 foot softbox over to the right of the camera.  I used a much smaller box with home made, black foamcore barndoors to keep the ovens from going too dark.  Once I showed Penny a preview she was excited and ready to work the shot.


Our total set up time was 20 minutes.  Shooting time, 10 minutes.  Tear down and packing 20 minutes.  She was cautious about her time when we came in but by the time we finished she was smiling and handing us bags of cookies.  Really good cookies.   We both managed each other's expectations and we both won.


When on location it's best to walk in looking for what you know you need.  I always look for the right background first.  Then I look for the right middle distance setting and then I figure out the position I want my subject in.  To a large extent the pose is based on how the subject fits into the constraints of the space.  The pose (for my work) has to be comfortable, realistic and calm.  Once we have lighting that brings the space together instead of accentuating three different planes we're ready to shoot.


How do you make them smile?  You can't make them smile.  You earn the smile.  You do it by making them comfortable and collaborating with them.  You earn the subject's smile and good wishes by making sure that you are sharing your "A" game with them and not just knocking out another job.

7.27.2010

Spelling Bee. It's a lot like life. Distilled.


Photo above from a postcard for the Zach Scott Theater production of:  The 25th Annual Putman County Spelling Bee.  All shot with Olympus e-3 and 40-150mm lens.  Lighting:  Profoto Studio Flash.


I've spent the last few days working on the kind of job I really love.  It's an annual report for a large governmental agency that builds roadways in central Texas.  And I love the job because it combines portraits, done on locations outside, with enormous earth moving machines and the elements.  The photo of the Spelling Bee production has nothing at all to do with the current job but when you are working on commercial projects you are usually subject to an embargo.  It basically means that you can't publicly show the work you're currently doing until the project is printed and out from the client.  But I wanted to write about a few things while they're fresh in my head, so you get to look at the photo above.

One of the things that makes this current project wonderful is that I'm working with a kindred spirit.  She's a project manager with the power to make judgement calls and not be second guessed.  She's a former English major so she gets that everything doesn't need to be linear or to rigorously follow a pre-ordained game plan.  She's open to my suggestions and I am open to hers.  If a particular shot has to be done in a particular way to appease someone further up the org chart then we usually agree to do it their way and our way.  I guess I'm just saying it's nice to collaborate instead of being tightly comped.

Instead of the old school way of trying to shoot as much as possible in an eight hour day we're working by the shot.  We all get that shooting in the heat and humidity wears us down quick and that four good shooting hours beat the hell out of the death march for the sake of the mythical "day rate."  We have a budget.  We have a schedule.  We're out for efficiency and quality.  Yesterday we started way north around 1pm.  I know this might be an affront to all the old guys out there but once again I chose not to drag an assistant around with me.

We hit the location, a big hole in the ground, and looked around.  Loved the big earth moving machines and the poured concrete pillars that will someday soon be an overpass or span.  That would be our background.  Our brief on this location was a photo of the very experienced concrete expert.  I lit the guy from about six feet away with an Elincrhom Ranger RX AS pack and one head.  The head was fired through an Elinchrom Varistar which is a small, (32 inch) shoot through umbrella box.  I taped a one quarter CTO filter over the flash head to warm up all the light that the flash provided in the photo.  I set the exposure so the flash would be two thirds of a stop brighter than the ambient exposure.  Not too tough since we had massive clouds and it was threatening rain.  It took me three attempts to tape the filter on the unit as the humidity was near 100 % and the sweat would drip down my arm and slurp across the front of the filter gel.  Eventually I got everything to stick together and we took off and did some images.  The reason for the 1/4 CTO is to make the foreground subject a bit warmer than the (in this instance) glowering sky in the background.  When I take the images into PhotoShop and correct for the color temperature on the subject's face the background goes a nicer shade of blue.  The contrast is more interesting.

I shot with the Canon 7D instead of the Canon 5d2 because the 7 syncs slightly faster, 1/250th versus 1/200.  I've also come to appreciate the flexibility of the 15 to 85mm EFS zoom lens which only works on the smaller sensor cameras.  I shot most of the images at 1/250 with an f-stop ranging between f11 and f14.  The camera was locked at ISO 100.  And I will say that at ISO 100 all cameras are good.  The 18 megapixels in the 7 are certainly enough for a double truck spread, if my designer goes in that direction....  The 15-85mm might not be one of Canon's "L" lenses but when you apply all of the auto lens correction in the cameras and in Lightroom 3 it's performance is nothing to sneeze at.  Everything I've inspected, at 100%, is sharp and meaty.

I've been using Sandisk Ultra UDMA 8 gig cards in the 7d and find the throughput to be a whole world of difference vis-a-vis the older versions of CF cards.  When shooting full RAW files the camera writes the files in less than half the time when compared to the fastest of my previous selection of cards.

As we progressed through the day we put the Elinchrom in some nasty situations.  Down in a freshly dug twelve foot deep trench where the contractors were laying pipe,  on freshly dug up dirt,  and on the edges of concrete pours----always in high ambient temperatures----with nary a misfire.  The real test came with a freak downpour and thunderstorm.  The pack was splattered with fat raindrops and the surface it was resting on instantly pooled about 1/2 inch of water.   The head was mostly inside a softbox so I was less worried about it.  The plug covers worked and the engineering that places the battery in the bottom of the box but the connectors in the middle also worked.  The top cover is gasketed and uses touch switches which are also sealed.  I wiped the unit off with a rag and, as soon as the rain stopped, we were back in the business of banging out photons.

The other interesting thing about the big Elinchrom pack is this;  we got at least 600 half power flashes over the course of the last two days without drawing down the power indicator from full.  From my experience we would have been through the Profoto battery on the Acute 600b at least four times in the same shooting situation.

When shooting in sunlight I've learned to do two things to make the shoot work better.  First, I put up a 4x4 foot black panel, centered behind the camera.  This means the subject will have something dark to rest their eyes on and I think it helps prevent blinking and squinting.  I also "fly" a black panel over the subject's head to shade them from hot, nasty, direct sun which enhances the directional look of the softbox light from my Elinchrom set up.  If we do anymore shoots that last more than an hour in the sun I'll start bringing white umbrellas and light stands to provide shade for me and for the art director.

Several shots required me to climb over really, really rough ground, through some mud and up the side of a mountain of dirt.  I thought about taking the Elinchrom but I just didn't feel like dragging the kit and two twenty pound sandbags and 1/8th of a mile, uphill, so I took a Canon 580ex2, covered with a 1/4 CTO, nestled inside a small Speedlight Prokit softbox (maybe six inches by 10 inches of the front?)  and used the flash/camera's ability to do FP flash.  By this time the clouds had all but occluded the sun so the flash didn't have to make any really heroic efforts.  I was using an aftermarket TTL cord that gives me eight feet of leeway and the PR person who accompanied us on this particular day kindly agreed to act as a mobile light stand.

We have about five more days of shooting to do on this project and I'm really looking forward to them.  As a bonus, the marketing director tells me that on two of the days we'll actually be shooting in interior locations.  How wonderful is that?


7.24.2010

And so we had this big brouhaha! About free. But what matters to me is how much I like the photos.


Father and son.  At a photo shoot for the Austin Lyric Opera.  Camera: Kodak
DCS 760.  Lens:  Nikon 105 defocus coupling.  Light:  Profoto tungsten, 6 foot
diffusion panel.

I

That Looks Good Enough to Eat

That Looks Good Enough to Eat  (originally written in 2008 for www.prophotoresources.com)


Much of my day to day work involves photographing people.  I photograph executives.  I photograph workers on production lines.  I photograph people doing the things they do in every day life.  And I photograph people to see how they look when they’ve been photographed.  But sometimes I photograph things other than people.  My next favorite subject is food.  I’ve been photographing food every since I was thrown into a fabulous cookbook project by an editor at Texas Monthly Press back in 1982.  The book was a comprehensive look at the best Mexican food in Texas, created in such lofty venues as The Mansion on Turtle Creek (Where the valets kindly asked me to park my disintegrating and ancient Volkswagen bug around the back in the employees’ parking lot),  El Mirador in San Antonio, and, of course, Fonda San Miguel in Austin, Texas.

Back then I knew the rudiments of lighting with strobes and I was okay at mixing daylight with strobe but I’d never shot a plate of french fries, much less a beautifully presented bowl of Tortilla Soup.  A week before I left for the job I read every book I could find on the subject.  There were very few and they were mostly written in the 1950’s and 1960’s with much emphasis on eight by ten inch view cameras and thousands of watts of tungsten light.  What I gleaned in my research was how important it was to keep everything in sharp focus.  As Grandpa Simpson (The Simpsons/Fox TV) would say,  “That was all the fashion in my day.”  The other two things I learned that have worked over the years are:  1.  Food looks better if the main light is big and relatively soft. 2.  Food looks better is the light comes from at least a 90 degree angle from the camera and preferably from slightly behind and above the food.

Hudson's on the Bend.  Mixed Grill.

Over the next two decades, on the strength of that bestselling cookbook that eventually went into five editions, including a paperback, I have been called on repeatedly to shoot food.  There have been some massive changes in the equipment we use now and even more profound changes in the style and look of food photography.  The look has evolved from an ethic that kept everything on the table in sharp focus to a look were only a sliver of the featured dish need be in focus at all.  Gone are any visible lighting artifacts such as sharply defined shadows or bright specular highlights.  Now food is lit to emulate the effect of gentle, north light cascading through a large, conveniently placed window.


My four by five inch view camera is long gone. My camera of choice for food is my old Kodak SLR/n, one of the few 35mm style digital cameras that did not employ an anti-aliasing filter.  No reason to worry about moire when shooting food.…….  But lately, for expediency’s sake, I’ve been using a D300 and have general been pleased with the results.  Plus it plays well with dedicated flash.

 And speaking of flash, my collection of Profoto Strobes and their attendant accessories have been relegated to semi-retirement in my equipment closet.  When I go on location to shoot food for editorial clients my lighting kit looks light this:  One SB-800 flash, three SB-600 flashes, one SU-800 wireless controller, one forty-eight inch white, pop up diffuser.  One piece of four by four foot white foamcore and plenty of batteries.

(photo:  Four Seasons Dessert.)


The camera/lens combinations I’ve used for the images showcased here is mostly the Nikon D300 with a 70-300 VR lens, or the 16-85mm VR lens.  I also pack the new Nikon 60 AFS macro lens for extreme close-ups or situations when I need very narrow depth of field with very high sharpness.  That’s really it.  All this stuff fits into on Think Tank Airport Security case.   Of course there is a stand bag with a motley collection of stands, stand adapters, an arm to hold my diffuser and a small Velbon carbon fiber tripod.
So, on to the shooting.  Editorial food shooters really do most of their work from 2pm till about 5:30pm.  Most restaurant people aren’t up early enough to do anything coherent in the morning and evenings are when they make the bulk of their income.  We tend to slide in after lunch and slide back out a bit before the first seating at 6pm.

The first thing on my agenda is to get with the chef and explain just what the magazine and I are interested in.  I really try to resist heavy handed art direction because I think it is important that the food be a realistic representation of what our readers can expect when they go out for a meal.  Once the chef and I are on the same wavelength we establish a time line for the shoot.  The last thing I want is a manic chef bringing out a ton of food at once.  A shoot can only go so fast and I never want to shoot a plate that’s not hot and fresh.  Ten minutes out from the kitchen and the food just seems to die on the plate.  Once we’ve established our timing I start my process by looking for a good background, because when I’m shooting tight on the food the only things that will show are the food, a small bit of the table top or shooting surface and whatever background I’ve chosen.    (photo: Driskill Hotel.  Dessert)

With the background selected I drag an appropriate shooting surface into position and stick a plate that will match the “hero” plate into place.  I’ve done these kinds of tight, one plate, “hero” shots often enough that I’ve developed a routine for the lighting set up.  I start by placing my large, white pop up diffuser on a arm, attach it to a short light stand and place it as close to the plate as possible 90 degrees to the side of the camera position.  It’s important not to tilt the diffuser over the food because you will inevitably get broad, bright reflections on the plate.  In most set ups the plane of my diffuser is inches away from the side of the plate.
Hudson's on the Bend.  Crab Cake.

I place an SB-800 six feet away from the diffuser  and use the zoom feature on the flash to tighten the beam so that it efficiently lights the surface of the diffuser with very little spill.  That’s all there is to the main light.  I may tweak it after I see how it works with the food but it’s usually just right.  I hate using a second lighting instrument for fill so I rely on a white foamcore board or an additional pop up reflector place on the opposite side of the plate to bounce back some of the main light to open up the shadows.  I’m a sucker for a nice dark, dramatic shadow so many times I’ll back the bounce fill away four or five feet from the set.

When the main light and the fill are set I turn my attention to the background light.  This light fulfills three requirements:  1.  Lighting the background adds depth to the shot.  2.  Lighting the background provides valuable separation between the hero and the rest of the image.  3.  Used correctly the light will fall off from side to side and from top to bottom and provide a nice vignette for the main subject.  The background light is usually a Nikon SB-600 used on the little plastic foot that comes packed with the flash.  If I need it a bit higher I’ll use a stand or just place the flash on a convenient chair.  Then I go back to the camera position, pop a frame and evaluate the effect.  The background light generally requires the most finesse and careful attention needs to be paid to the spread of the light so that the beam opens up the space around the hero but still drops off sufficiently around the edges of the frame.  Once the background light is set you are 90% done with your lighting and any additions at this point are just accent lights.

With delicate entrees that have some height to them I always like to bring in a third light that acts as a backlight.  This light should be much weaker than the other two and should just showcase the translucency in delicate greens and other food stuff.  It can also provide a nice (hopefully subtle) edge lighting to the entrée to increase the snap or overall contrast of a shot.  Beware of lens flare from this one.  When I use a lens with a complex amount of air/glass interfaces like the 16-85 mm Nikon zoom I have to carefully shield the front element of the lens from any backlight or it will flare and reduce the overall contrast of my scene.  A snoot made of black aluminum foil or a grid attachment on the front of the flash is an effective way to focus the backlight and limit spill light.

When the last light is in place you test until you are certain you’ve got what you want and then you have the chef bring out the first plate.  If you have a good collaboration the chef will make you two plates.  The first is the the “stand-in” and you’ll use it to fine tune your lighting and composition.  You’ll also be able to evaluate the direction the plate should be turned in relation to the camera to best show off the food.  Now is the time to tweak composition by raising or lowering the camera to best look into the bowl or plate.  When everything is ready you’ll signal the chef to “plate” the hero and bring it on to the set.  Have a clean towel and some toothpicks standing by.  The towel is to wipe off any errant spills or fingerprints while the toothpick is there to gently pull at small parts of the presentation that might need to be moved a bit or “fluffed”.

Now shoot like crazy and bracket a bit while the food is hot, fresh and juicy.  After you have the keeper you pre-visiualized try changing camera angles and camera heights.  Also try to zoom in and get close on a detail that may act like “shorthand” to describe the entire dish without having to show the entire dish.  If you and the chef have both done your jobs well the actual shooting should take five minutes or less.
Camera settings:  We always shoot raw when doing food.  I know that we’ll only be shooting ten or fifteen frames so buffer and card space is never an issue.  I can use the D300 at ISO 400 and get really nice results.  I can’t really see a difference between the two when the image are printed so I always choose ISO 400 in order to use less power in each of the flash units.  Since I’m rarely trying to shoot stopped down beyond f5.6, and usually more like f4,  I can use my main light at 1/2th  to 1/4th power, my background light at 1/4th to 1/8th and my backlight at 1/16th power.  With settings like these I don’t even worry about external battery packs.  Internal flash batteries will last for several shoots before needing to be changed out.

While I’m shooting raw I want to get as close as possible to an accurate representation as I can so I don’t have to chain myself to the computer and monkey around with an image that needs gobs of post production help.  I know from experience that the color temperature of the strobes is around 5600K so I go ahead and set that manually.  If I’m using one of the new Nikon cameras I try to always take advantage of the Active D-Light control to create greater dynamic range in the image. (Everything helps when you will eventually be converting your images to CMYK and seeing them printed on cheap, matte paper.…….)

I try to set a shutter speed that’s slow enough to allow some of the ambient light to seep into the shot but not at the expense of the color control provided by the speedlights.   I never really mind when daylight shade is added to an image but I try to stay away from mixing strobe and tungsten light sources.  Food should be rendered with as little aberrant color shift as possible in order for it to be visually engaging.
Many are the urban legends about the process of food styling for a shoot and no doubt many of them were true at one time or another.  You hear stories about stylists or photographers painting roasted turkeys with shoe polish,  concocting scoops of lard and powdered sugar mixed up to make ice cream and applications of motor oil to steaks to get just the right glisten.  If the food is the hero it’s not only unethical but it is illegal to alter its general appearance if the shot is destined for advertising.
Hudson's on the Bend.  Berry Shortcake.
We use just a few things to help food along:  1.  a clothes steamer place under a plate cover will revive a dying entrée for a few more moments (but will wreak havoc with raw vegetables and garnishes).  2.  Olive oil or canola oil, delicately applied with a brush, can spark up meats and grilled vegetables.  I think anything else should be done in the cooking itself.  If a plate is not up to snuff figure out a kind way to redirect the chef and try again.  Remember, if you are working for a magazine you are providing the restaurant with an incredibly valuable bit of free advertising and the cost of another steak or chicken leg is downright negligible in comparison.  Most chefs will be happy to accommodate you when they understand the long term benefits of a good relationship with the media.

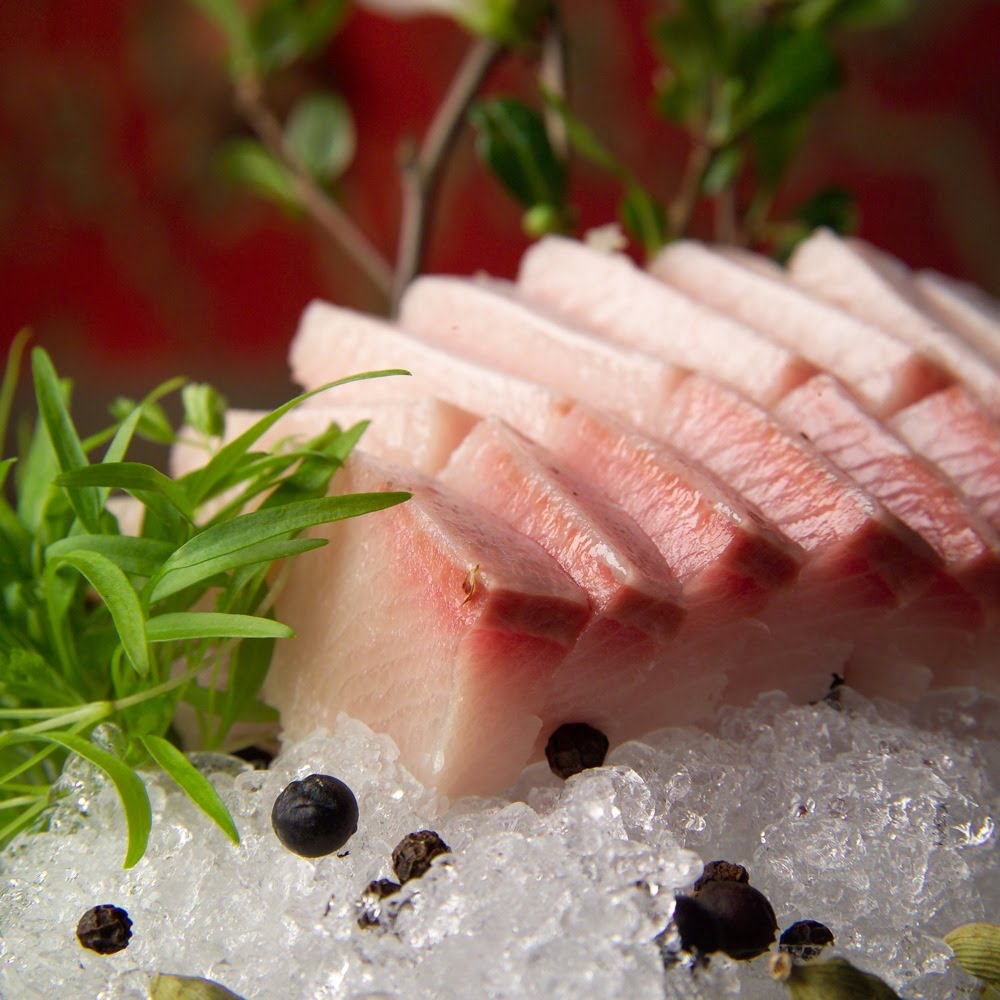
There is one truth to the rumors surrounding food photography.  You generally do get to eat the props when you are finished!  I must tell you that the hashimi at Uchi and the crab cakes at Hudson’s on the Bend were both absolutely first rate.

Food is not complicated and it’s photographic presentation has  changed from the days of big film and big lights.  The approach I’ve outlined here is best used for editorial clients where you are working without an assistant or stylist on the set.  For advertising shoots with their layers of approval and their “stop and go” nature you should probably default to traditional lighting if for no other reason than to provide your art direct with the luxury of modeling lights and the perception of more professional rigor.
(photo: hashimi.  Uchi.)
I hope that between the descriptions I’ve provided and your ability to “reverse engineer” lighting from the supplied images that you’ll be able to understand the way I used the lighting and cameras.  I wanted to provide diagrams but scheduling reared its ugly head and I find myself writing this on the way to Pasadena California on a Southwest Airlines flight.  No time for drawing!  Until next month, Bon Appetit!  and Light Well!

Kirk Tuck